Connecting the Cables (Part 1: Phonograph to Receiver)
Here are the three major devices we're going to need to connect together
in order to get the musical signal from our phonograph to our computer's
sound
card.
On the left is the computer's soundcard interface. On the top right is the
turntable, and on the bottom right is the stereo receiver. Recall that we
will be using the phono pre-amp that's built-in to the stereo receiver.
The Big Picture
We need to do the following:
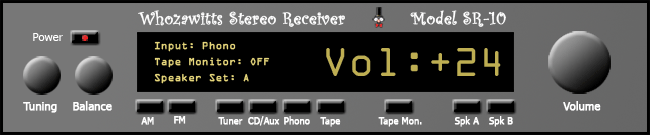
Connecting the Phonograph to the Receiver
People are sometimes afraid of ruining something by plugging cables into
the wrong jacks. That's understandable, but we're going to learn by trial
and error here on this web page first, where no real equipment can be damaged.
Our first task is to connect the phonograph to the receiver.

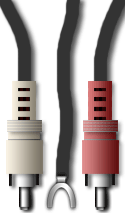
Here we're looking at the back of our phonograph, the cables that come out of
the back of the phonograph, and the back of our stereo receiver. Can you identify where these cables should be plugged in? Click on
the appropriate jacks on the receiver below.
|
 |
|
| Click on the jack below where the white RCA cable should go. |
| Click
on the jack below where the red RCA cable should go. |
| Click on the jack below where the phono ground wire should go. |
|
|